Pages

Showing posts with label Nature. Show all posts

Wednesday, July 13, 2011

Improved Method of High Pass Filter Sharpening


It's those little problem areas that upon closer inspection, especially if image is to be printed large, are occurring throughout the image in less intensity. But they are still there.

I have many times used the blur tool in sharpening layers to reduce some of the inherent noise that the process of sharpening brings by its very nature of operation.

I normally don't use the High-pass method in many larger prints I make because of this increased noise, especially in soft areas like clouds or flower petals.


The leaf cluster on bottom left was added from another version to give this photograph a standard triangular view with focal points

To alleviate these noise problems I decided to first blur the high pass filter layer  and then apply a curves adjustment layer to the high pass layer only, to improve contrast with some of the softness created by blurring.

Detailed PDF Document Available
I experimented with 5 other combinations including using the luminance filter (noise reduction) in ACR
for input to High Pass Filter Sharpening.  This document contains numerous photos clearly detailing the process and results from 6 versions. One being the camera default.

It is available on Niels Henriksen Artworks site at the following link.


The reason for creating it in a book format is it allows me greater control over layout and by shifting to a landscape format should filter better with our horizontal monitors.

Let me know what you think about the PDF version.


The above photo shows results for using the high pass filter only and then repeating with a curves adjustment layer applied.  You can see how the veins are crisper and if you look carefully there is less noise on the smooth stamens. The PDF article shows a close up of stamens.

A setting of 2.1 was used for both Gaussian blur and high pass filter. It's always going to be a trade-off between reducing noise when sharpening and still having good edges.

This process will make it easy to create an action in Photoshop, whether modifiable or a straight run.


This is original version. I cropped the details on the  right and also removed some of the leaf tips near flower cluster.  Leaves from another image at wider angle wear to balance the composition.

I always try and take a few extra photos at a wider angle for that just in case you need it.


Niels Henriksen


Wednesday, March 30, 2011

San Miguel de Allende - Part 2


While San Miguel de Allende is an historic town with lots of vivid color, there are other interesting elements besides those great buildings.

Just up the hill of Park Juarez  towards Casa de Sierra Nevada are trees loaded with Great White Egrets this time of year.
In this photo, most likely a male (but I am no expert) is bringing back a stick for female to build the nest with.

When he lands beside his mate, this is the gentle tug-of-war between them for several seconds which can be seen in the photo below.
 She always wins and then starts to add it to the nest.

Just beside the hotel are a lot of steps that lead up to a favorite lookout point. I had to stop twice to rest on the way up.
 From this image it is clear to see that San Miguel sits in a bowl. A giant bowl but lots of steep walking.

The church with spires is 'La Paroquia' and to the left is the 'Bellias Artes', the national institute of Fine Arts. To give the front building more emphasis I desaturated the background a little. Otherwise the important items get lost in the details.

If you continue  up from here, you will find the  'El Charro del  Ingenio' Botanical Gardens.  San Miguel in the winter is very dry, hasn't rained once in 5 months and therefore one would expect more desert like plants. I am sure that in the raining summer months the foliage must explode in flowers before the next drought starts.
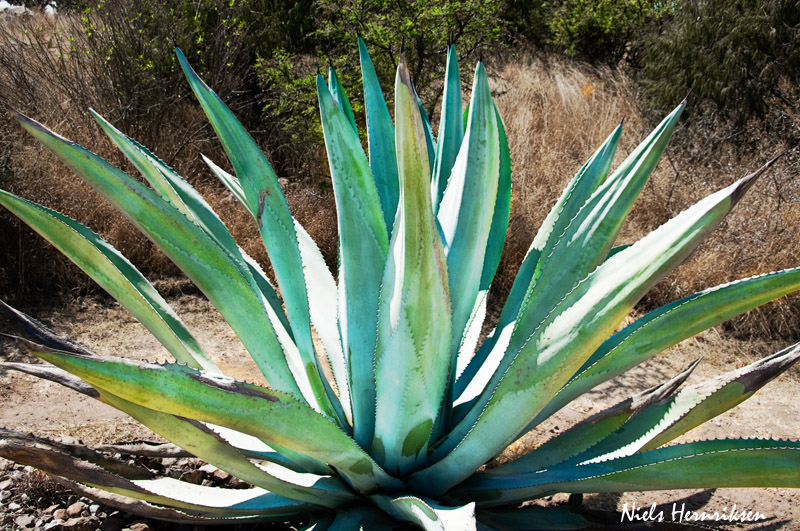
 This part of the cactus from above eye level is at least 8 ft long.


 You can also darkened and desaturated background to enhance the yellow new growth
 
In a dry environment the colors are mainly muted browns and dull  greens. Converting to B&W takes the focus away from the dull colors to stronger patterns.
 You can, with tools in Photoshop, enhance to subtle colors and make them stronger and more vivid. De-saturating the background and darkening helps to keep the focus on the plant.

Throughout the town, the Jacaranda trees are in full bloom. It's a bit strange to see a vivid lilac-purple tree with no green leaves.
 Also, the Monarchs are starting the northern journey and settling in the trees during the night. In the day time with the warm temperatures, they are very active and hard to photograph. I did manage with a long zoom and judicious cropping to get a photo of one of the monarchs.
 I love this place. People are very friendly and the food is great.


Niels Henriksen

Wednesday, May 26, 2010

Tutorial - Extracting Image with Blurred Edges and Replacing Background


This article describes how to extract objects that have some movement on the edges and then replace background and not have the image appear as a cutout and placed on a new background.

The main feature is selecting the outline of the ducks with magic wand and then applying a white colour stroke to create a 10 pixel outline. This will be used later to re-introduce some blur around the duck wings to make this more realistic and not quite the cut-out effect.


The black winter pool cover was still on in the backyard pool and with some recent rain, two Mallard ducks thought this was an interesting place to visit and feed on some of the algae growing in the warm stagnant water.

There is a cedar hedge all around the yard so with this privacy, they have landed many times over the years. This always gives me a great opportunity to step out and photograph at close range.  They are not too afraid and normally I can get to within 15 feet of them. The problem is actually getting them to fly away for those interesting winged shots without scarring them so much that they won't come back.

I noticed that the male duck would bob its head up and down as I would approach.  I mimicked this bobbing motion and within a few moments this caused them to fly away.

A soft sky background would make the Mallards stand out nicely. Just having installed Photoshop CS5, I thought this would be a good opportunity to try the new refined edge when creating masks.
I will explain my approach by using the layers' palette, as the discussion's focal point, going from the bottom to top.

In the panel below (number 1-6 going left-right and top – bottom ) the image top right (#1) is the original capture as they flew away from the pool. The ducks are reasonably crisp but there is way too much clutter around and the female duck is almost hidden in the tree branches.


Original Duck Image – the original image captured by camera is in panel #1

Sky background
– suitable sky selected from files panel #4. It was flipped horizontally so that the diagonal of cloud sky edge matched the linear motion of ducks going from bottom right to top left.

DSC6177 Smart RAW copy for color extraction
– Copy of RAW file inserted as a smart layer. This version allowed me to darken the sky (more blue – panel #2) to help with refine edge to better detect change between white feathers and sky. Once mask refined, it was saved as a channel for each of the ducks

Mask for larger Duck -  The channel mask for large duck loaded and applied to copy of original duck image.

Mask for small Duck – The channel mask for small duck loaded and applied to copy of original duck image.

Mid Gre
y – A mid tone grey fill layer created to assist with viewing and refining edges against background. Some of the bird edges are white and with an almost white sky it is harder to detect edge.
Whenever using automated tools, I find it's always better to assist with the task by either changing contrast or colours to make the extract easier. Here I used colour changes in RAW files. Sometimes I may even go to over-saturation when dealing with earth tones.

Merge Ducks Master
  -  both masked images for ducks loaded as a new layer. See panel #3 but with no grey background.

Stroke Mask for edge of Ducks -  The Merge Ducks Master Copy and Mid grey selected and magic wand used on grey background. This gives me a marching ants selection around ducks. This section was then stroked (Edit-Stroke with a 10 pixel, white, center) setting creating panel #5.

B&W Luminosity – a Copy of Merge Ducks Master copied and set to luminosity mode.
B&W Adjustment color effect - A  B&W adjustment layer was applied to this B&W Luminosity layer and adjusted for desired colour effects. The Blue, cyan and yellow  increased to lighten colour. See panel #8.

High Pass
- Copy of Merge Ducks Master and a high pass filter applied and layer set to overlay mode. See panel #7.

Blurred Winged Edges – Original layer copied and Gaussian blur applied (3.5px). The Stroke Mask for edge of Ducks was applied as a mask and the main body duck edges were painted black with 50% opacity to reduce blur effect on these parts but have the most blur on the moving wings. Panel /6 is mask.

This stroke mask could also be used to reduce colour fringing around the edges by applying a Hue/Sat adjustment layer and reducing saturation of problem colour. The mask keeps the effect to just the edges and a smaller stroke pixel setting can be used to limit the width of colour changes.  Normally for photographers, the desired change is to replace skies. With desaturation, the greying will match tones of non blue skies. If blue sky is desired then use the Hue/Sat layer but instead shift the hue of the problem fringe colour.


This is a closeup of the male Mallard duck sitting in the swimming pool with some water on the black winter pool cover.

Niels Henriksen

Saturday, March 20, 2010

10 Great Photography Projects – Setting Up a Home Studio


Give yourself a perfect project by setting up a ‘Home Studio’.
To many people, this expression probably connotes settings up the traditional studio to photograph people for family portraits. But why not set a studio where you can bring the outdoors inside and then you have the ability to control the weather and lighting.

A studio is really a place where the photographer can control the weather and keep it dry or do the opposite and more importantly, have control of the lighting. Except for serendipitous moments, most great photography is all about lighting. Any subject might perform well if the right lighting is brought to bear.

Difficulty: Easier if you buy and harder if you are more inclined to be a DIY hands-on person but a lot more fun, which that tends to be my approach.

There is no way a big landscape scene is going to work at home unless I build a good diorama and even if I did, it would be through the photographs of the original scene I would be using.

But the smaller items will work fine. These can be flowers both bought and picked fresh, even weeds are wonderful. Everyday objects around the house or found through scavenger hunts at garage sales, flea markets and antique curio stores.

Nikon D300, 18-200mm Nikon VR II, ISO 200, @200mm, 1/500sec, f5.7

Benefits
Light. The intensity, direction, reflections and even absence of, is what helps to make photographs dramatic. The home studio allows you to control all these variables.

It helps you see ‘light’, how it touches and seems to curve around some objects. How it hides and then again resurfaces as reflected light.

You will be amazed that after you study light in a controlled setting like your home studio, venturing outside will enable you to see light as a shaper of objects and not just a time and place that a photograph was taken.

The Basic setup
While I will be discussing the indoor setup there is nothing wrong being outdoors, such as with the 3 photos of birds I show in this article. These were accomplished with aid of a bird feeder, a nice sunny day, a chair just a few feet away and a cup full of patience to wait it out. Next time I am going to use the brighter Nikon 70-200mm f2.8 VR lens.

I keep the viewfinder in one eye and the other open to observe the wider field of view. When a bird starts to fly towards the feeder, they are fast, I just press the rapid fire button at 6 fps and hope for the best.

Location:
The first prerequisite to setting up is that of a location. Any location will do, suitable being very subjective and amazing people have done amazing things in small places.

An area of open floor space is ideal, preferably without a rug. If using floor reflectors, then the uneven rug surface makes it harder to place correctly.

The kitchen table is also a perfect starting place with a large surface and being somewhat portable. Easily moved towards a window light.

The size of object(s) and minimum focal length of setup shoot determine best height. I have set up on a table and then realized that to photograph the way I wanted meant I would have to paste myself to the ceiling. Adjust and set up on floor.

Nikon D300, 18-200mm Nikon VR II, ISO 200, @200mm, 1/1000sec, f5.7

The Light
The next is light. Natural light being good sized and available on several walls is a great start. Direct sunlight is not the best unless you want photos with extreme contrast. Modify the light through a white sheet or any colour over a window and you have a perfect soft box.

Electric lights from tabletop or stand lights ranging from incandescent to halogen for subject highlighting, and in some situations, can become the main lights which are needed for dramatic images. The big problem with house lights is that they come in many types and each has their own colour spectrum.

Try and stick to one type so as not to have different colour casts in image unless that is what was desired. When using florescent try and select a balanced daylight version.

One problem with always-on lighting is that when there are too many, they can get very hot. Having a master power bar near you makes it easy to turn on/off for short periods without having to walk around to each.

The external flash is a very good light as it best matches natural daylight, very portable, and low heat. The disadvantage at first is there is a learning curve to be able to control the light power needs and it is hard to see effect during setup unless you have a modeling button. Once you are comfortable with flash these are excellent sources for very controlled lighting effects. Good links below:


Reflectors
Up to now, if you where lucky there has been no additional costs for the above items. Reflectors can range from being readily available such as mirrors or white panels, or home made from hardware or artist supply items, up to professional photographic reflectors.

The photographing I do is not time sensitive nor profit oriented, therefore making my own is the best answer. I tend to use 4X4 sheets of mat board used for photographs and paintings. Easy to cut, light and only a few dollars each. There is no need to get the archival quality material as cheap is the best. A hot glue gun and a few backing pieces will get them to stand up perfectly at any angle you choose.

Nikon D300, 18-200mm Nikon VR II, ISO 200, @200mm, 1/800sec, f5.7

Backdrops and Materiel
For a lot of studio photography there are only 2 backdrop colors needed, black and white. Maybe a mid-gray and a blue-green colour not found in nature for the background extraction.

For white, almost any material will work as bright white is by nature very reflective and therefore shinier materiel such as thin cotton, polyesters, and canvas work well. Black is different and the best I found is to use a thick felt type materiel which is almost mat in reflectance and there does not tend to show any light spilling onto it.

A couple of spring mounted extension poles that reach the ceiling and now you have an easy method hanging backdrop materiel.

Light Diffusers and Modifiers
These can range from as simple as a white bed sheet for windows to:

Coloured transparent wrapping paper are inexpensive tinting sheets for colourizing light.

Coroplast is wonderful corrugated rectangular plastic tubing made into sheets. If you get the semi-clear sheet these make great diffusers. They can also be cut and shaped and glued into any form. I have also used these outdoors and a diffuser and wind break when photographing flowers and things. Two heavy gauge metal wires are used as stakes, through each end of the tubing row, to hold panel in place.

Mirror-like black plexiglass adds a deep richness when you need to have dark reflections.

Opaque Mylar provides for very soft diffusion and I use sheets of these with a cut-out box made of the coroplast above. This give me a grid structure, which is opaque for a make your own tent.

Cones and Grids can change the light from a wrap-around to more of a spot for highlighting parts.
Remember that if the light is hot then don't use any materiel that will burn or melt or only use for brief durations.

Miscellaneous Resources
There are several excellent web resources for DIY setups and photography how-to, which can be found on the links below.


Niels Henriksen


Tip Note:
In the above photographs they were captured as fast motion and therefore slightly blurry. I therefore need to enhance the structural elements of the birds such as the feather outlines. This was accomplished using HIRALOAM sharpening method. Hi Radius and Low Amount also referred to as Reverse USM creates broad sharpening bands and not just edge sharpening. I used a sharpen setting of 150 for amount and a radius of 10. I duplicated this sharpened layer and set one layer to lighten mode and the other to darken mode and then masked in the desired parts.

There is no one setting that works for each image but I normally start with an amount set to 250 and radius to 50. I then adjust the radius setting until I see bands (over-sharpened areas) that best match the effect I want and then dial back on the amount. It still looks very overdone but when set to the other blend modes it now has a better result. The adjust opacity to taste.

Like

Related Posts with Thumbnails