One of the big tourist attractions when you visit Denmark is to see LegoLand where it originally started. It’s on the same scale as the Taj Mahal or Petrus but it is one place that you should visit, especially if there are young kids or you have not quite left that mind set.
Legoland is all about colour and even these carts for parents to place their kids are brightly coloured.
While most of the day was spent with the family and the young kids running around looking at scale model of buildings, train rides and amusement activities, I thought I would also see if I could use my camera to render parts of the park interestingly. Reproduction of Nyhavn tourist harbour in Copenhagen, Denmark
 The lego trains ride around on the tracks and the old locomotives even exhausts steam.
 Under the water are tiny cables and the boats move on a course through the canals.
There are models of Fredensborg Castle were prince Fredrick Henriksen (hey that’s my name but no relation) lives with his wife Mary. The Danish royalty only use their first name and it was when prince Fredrick lived in USA that he was forced to take a last name. He chose Henriksen, an old historic Danish name.
A photo of the real castle is shown below, but at a more realistic street angle.
It’s not all about Denmark as throughout the park are many other models such as the Taj Mahal, Eiffel Tower, 4 US presidents and many others and of course, the NASA Space shuttle and launch pad.
Legoland is just not about the recreation of famous locations in Lego blocks. There are also marching bands and fun water events at least if you are standing and watching.
From the top of the rotating tower, there is a view of one of the Lego sets.
Thanks for viewing today and through all the year.
To all, whether just up-coming or recently past, have a festive and joyous Christmas, Hanukkah, Islamic New year Muharram and to all other events I may have missed.
Niels Henriksen
There will be no article next weekend but the following in the start of the New Year.
Sunday, December 21, 2008
The Original LegoLand – Denmark
Sunday, December 14, 2008
Printing Your Own Business Cards and Book Marks
Since this belongs to a Photography Blog, I feel that I should at least insert a few pretty ordinary pictures even if I am going to discuss printing your own business cards and bookmarks.
On Friday night the moon was at its closest distance to earth (4 hours after perigee) when it sis 14% bigger and 30% brighter at 5:00pm EST Dec 12. I had planned to be out at sunset to take images but got distracted with the constant cleaning up we are doing with some construction work that’s still ongoing. It was to take a week and now we are entering our 4th week of dust, dust and more dust.
When I went out to get the paper this morning, the moon was just starting to disappear over the western horizon and I remembered the perigee thing and grabbed my camera to capture a few images.
There were crows flying past the moon but not exactly where they are now. I combined 2 other images and placed the birds where I thought they would have good effect. Since the light was changing I used the curves tools and eyedropper to ensure that the blue around the birds where identical to the background. I set one control point to background and the other on the blue near bird. I then used a curve adjustment layer and tweaked individual the Red/Green/Blue channels to match the numbers on the background. The reason I did it with this method is that with the moving birds there is a bit of blur near edges and it is difficult to extract just the dark parts without picking up a bit of the background colour at the edges. This approach will give you a perfect match. The contrast of the moon was increased slightly. The sun is just striking the treetops and giving it a red glow. This was taken a few minutes earlier at a faster shutter speed.
Making Cards and Finding a Good Case
If you own Nikon equipment then there are these beautiful stainless steel cases made for Nikon eyeglasses that come with a cleaning cloth. They make perfect business card holders. These were given to me but I am sure that any higher end optical glass wear stores might give or sell them cheaply to you.
I am surprised that they don’t come with the purchase of a high end Nikon camera.
I use Photoshop to make and print my own business cards on semi-gloss photo paper, as I like the feel and look of these cards. The only problem is that I can’t print on the back.
I create a Photoshop layered file with several images and a different layer for the different fonts and word colours. I also create a thin black border that will form a cutting guide for each of the cards.
I then create a picture package under the automated command and create a template that reduces each photo to a 2.5” x 3” card and places 8 cards on an 8x10” sheet. The master file has several images that I use so I can create various versions. See image below where I have combined them.
I use a sharp drywall utility knife and a metal edged ruler to cut out each card along the black lines. This is a bit labour intensive but I do like the quality of each card.
Now the Shameless part
Whenever I am in a magazine store reading photography magazines and I notice another person who seems interested in photography, I ask them if they read photography blogs and if the conversation continues I will ask them if they want a card to my site and if nothing else it makes a good book mark.
Yesterday I was in a multi-goods store and there were some people looking at cameras. I spoke to them to see if they need any help with camera selection and afterwards handed out one of my cards.
I never hand these out without having some dialogue with the person and I also determine first if they are interested in reading Photography blogs.
Larger Bookmarks
I also print vivid landscapes and cut them into strips and laminate them, yellow represents the clear plastic, and I hand these out to friends as 8” long bookmarks.
Easy to make Christmas or any type of gift for people whom like to read books. These have no advertising on them.
Niels Henriksen
Sunday, December 7, 2008
Nykobing Mors Panoramas
As part of my 8GB walk-about which I discussed in the last 2 articles (see realted links at end) I also decided to take some extra wide panoramic images. Having a small body of water between you and a landscape or cityscape makes it easy to get some long panos without having obstructions blocking your view.
The first image is 50,169 pixels wide by 3381 high and is comprised of 24 images. I used Autopano Pro to create the final jpeg. It does such a wonderful job of determining which parts to blend together and even straightening a few slightly tilted horizons.
For some reason Photoshop would not open the jpeg directly without giving a parsing error, but loaded fine when opened in ACR first. Go figure.
 I made this reduced jpeg 2400 pixels wide so you can see better details when you click on this thumbnail
 If printed, the above image would measure 209” by 14” or (approx 17 ft by 1 ft)
The image was shot without a tripod and that is why you can see a slight difference between some of the frames that made up the composite.
Photoshop is not Panoshop
After working with the panos in this article I have come to realize that Photoshop is not great with large panoramic files. It became excruciatingly painful to produce these smaller jpegs, with many crashes of Photoshop. I may not have the last PC but at 2.4Ghz CPU and 2GB of memory it took 7 minutes just to load the full jpeg image (66MB). It would crash when I cropped small sections and also would crash when I tried to save these smaller panos. I used a few tricks like cropping in small increments to finally get Photoshop to work.
 This is a close section of the harbour that is about 1/3 from the right and the image below is about ½ actual pixel size from the centre of the image above.
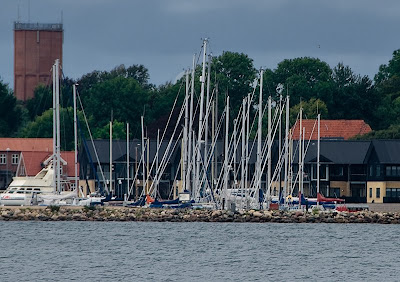 There is just something magical when I look at the full detail in the uncompressed version. It’s just like being there again with binoculars.
If Photoshop had problems just handling the final jpeg I am not sure how well it would handle the 24 RAW images and layers to make the composite. I don’t think I will even try.
Even Autopano Pro took 1 hour to render and compile the final jpeg pano. I now think that I may have taken on too much of a task.
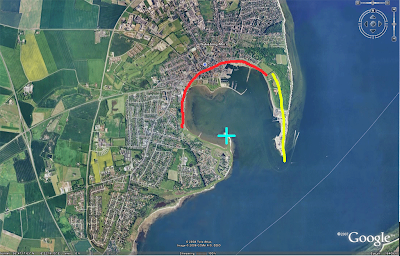
The map below shows the area covered by the 2 panos, the red colour for the pano above and the yellow for the next pano. The blue + is where I stood to take the images and was a perfect spot for 180 degree of rotation.
 I was trying to get a B&W pano that my nephew could hang in his living room. I didn’t find any sections from the first pano that seemed to work graphically enough.
The 2nd Pano (yellow line above is 30,350 by 3,139 pixels in size. I reduced it from the original 40K pixels width, because of the problems I was having with Photoshop handling the larger jpeg as I removed some of the treed shoreline on the left.
I did mange to find an interesting section that might work as a pano image with a bit more contrast built into the clouds.
Close-up section from image above.
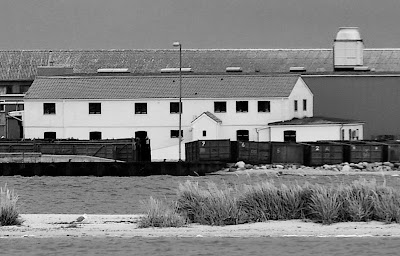 These are fun and I would love to have them printed full size but with the limitations of computing power I now need to rethink my approach to panos and make them more reasonable in size for file handling.
In a previous article “ Shoot Wide Very Wide Panos Images ” where I show some more reasonable panos images that could be printed and framed.
A few more image from the point.
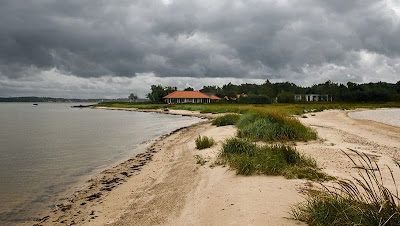
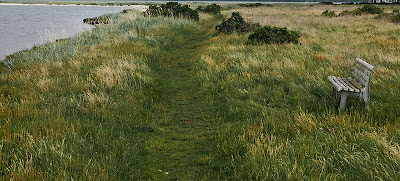
A pathway leading to the point on the top left.
Niels Henriksen
Related Articles
My 8GB Walk-about
8GB Walk-about Part II


