As part of my 8GB walk-about which I discussed in the last 2 articles (see realted links at end) I also decided to take some extra wide panoramic images. Having a small body of water between you and a landscape or cityscape makes it easy to get some long panos without having obstructions blocking your view.
The first image is 50,169 pixels wide by 3381 high and is comprised of 24 images. I used Autopano Pro to create the final jpeg. It does such a wonderful job of determining which parts to blend together and even straightening a few slightly tilted horizons.
For some reason Photoshop would not open the jpeg directly without giving a parsing error, but loaded fine when opened in ACR first. Go figure.
 I made this reduced jpeg 2400 pixels wide so you can see better details when you click on this thumbnail
 If printed, the above image would measure 209” by 14” or (approx 17 ft by 1 ft)
The image was shot without a tripod and that is why you can see a slight difference between some of the frames that made up the composite.
Photoshop is not Panoshop
After working with the panos in this article I have come to realize that Photoshop is not great with large panoramic files. It became excruciatingly painful to produce these smaller jpegs, with many crashes of Photoshop. I may not have the last PC but at 2.4Ghz CPU and 2GB of memory it took 7 minutes just to load the full jpeg image (66MB). It would crash when I cropped small sections and also would crash when I tried to save these smaller panos. I used a few tricks like cropping in small increments to finally get Photoshop to work.
 This is a close section of the harbour that is about 1/3 from the right and the image below is about ½ actual pixel size from the centre of the image above.
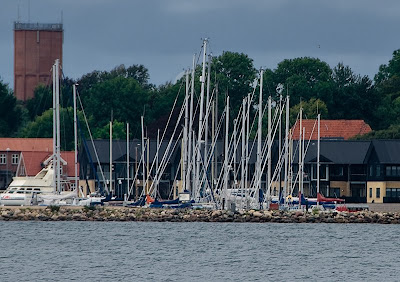 There is just something magical when I look at the full detail in the uncompressed version. It’s just like being there again with binoculars.
If Photoshop had problems just handling the final jpeg I am not sure how well it would handle the 24 RAW images and layers to make the composite. I don’t think I will even try.
Even Autopano Pro took 1 hour to render and compile the final jpeg pano. I now think that I may have taken on too much of a task.
The map below shows the area covered by the 2 panos, the red colour for the pano above and the yellow for the next pano. The blue + is where I stood to take the images and was a perfect spot for 180 degree of rotation.
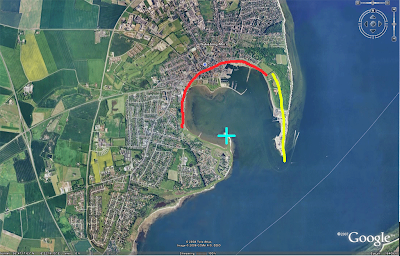 I was trying to get a B&W pano that my nephew could hang in his living room. I didn’t find any sections from the first pano that seemed to work graphically enough.
The 2nd Pano (yellow line above is 30,350 by 3,139 pixels in size. I reduced it from the original 40K pixels width, because of the problems I was having with Photoshop handling the larger jpeg as I removed some of the treed shoreline on the left.
I did mange to find an interesting section that might work as a pano image with a bit more contrast built into the clouds.
Close-up section from image above.
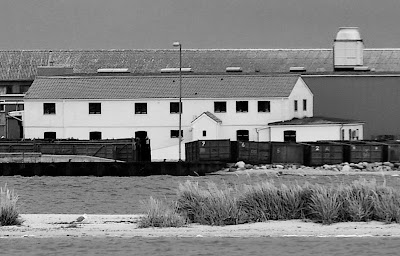 These are fun and I would love to have them printed full size but with the limitations of computing power I now need to rethink my approach to panos and make them more reasonable in size for file handling.
In a previous article “ Shoot Wide Very Wide Panos Images ” where I show some more reasonable panos images that could be printed and framed.
A few more image from the point.
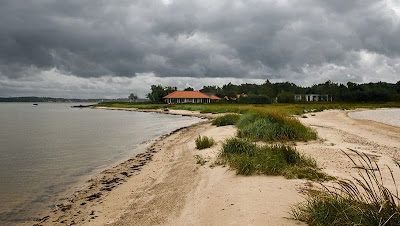
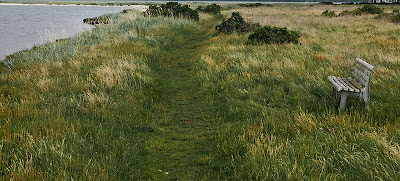
A pathway leading to the point on the top left.
Niels Henriksen
Related Articles
My 8GB Walk-about
8GB Walk-about Part II


6 comments:
That would be Photoshop CS3, CS4 or previous?
Just curious.
It was CS3.
To be fair, Microsoft XP at times has problems, but with these specific files it was repeatable.
I even re-booted the PC to make sure that there wasn’t any floating problems lurking around from other applications or Photoshop.
These were the largest panos I have created so far. It did find for may system that as long as I stayed below 30,000 pixels it work fine at least in jpeg mode.
I would like to upgrade to CS4 but I also want the content resizing and that is only available with the extended version and the current CS3 do not count (cost wise) towards a reduction in full CS4 extended.
Thanks Fadzlan for taking the time to visit.
Niels
Great to hear from you. I always wondered how much CS3 can take when they say its much more leaner than the previous versions.
That said, I read somewhere that says photoshop will behave differently once you have more than 4 GB of RAM. Never try though.
Why did you not use the tripod? Did you have time constraints or was there some other reason?
I did bring the tripod with but I only used it once when I was doing some macro shots, which I’ll show at alter date.
I found that the Nikon 18-200 vr lens did a great job and with the good ios capability of the D300 I did not need the tripod for blur free photos as I was able to good shutter speeds relative to the focal length.
I knew that the panos would be of a distance shoreline and therefore if there was any misalignment vertically I would be able to crop out and most of the water in the bottom or the top of clouds did not really add much to the best part of the building .
I do agree that when you need all of the vertical height a tripod becomes necessary.
Even then you could and sometimes should change the camera orientation to the opposite of pano direction.
Ie Horizontal pano, orientate the camera in the vertical direction because of camera format.
When crisp detail is paramount or you do plan to enlarge than tripod is mandatory as any hand-held shooting will have some blur. It is just in many photos then will not be observed.
Niels
Thank you for elaborating on a very interesting post.
Post a Comment